HTML stands for Hyper Text Markup Language. In this lesson we’re going to learn some of the basic rules about how HTML works, and how to write it properly.
Purpose of HTML
Essentially, HTML is there to describe the structure of the page, so they can be properly rendered by web browsers. The HTML itself is not displayed — the HTML is there to tell the browser how to behave and show the content within the HTML.
Elements & Tags
An HTML page is made up of elements. Generally, elements follow this pattern:
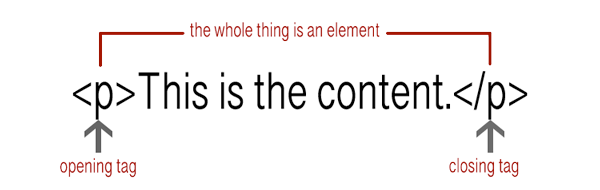
So elements are used to make up an HTML page, and tags are used to label what the content is, and how it should be rendered. (Paragraphs, headers, images, and so on.)
Most tags are closed, but there are some that don’t require a closing tag, such as images and horizontal lines.
Basic Tags
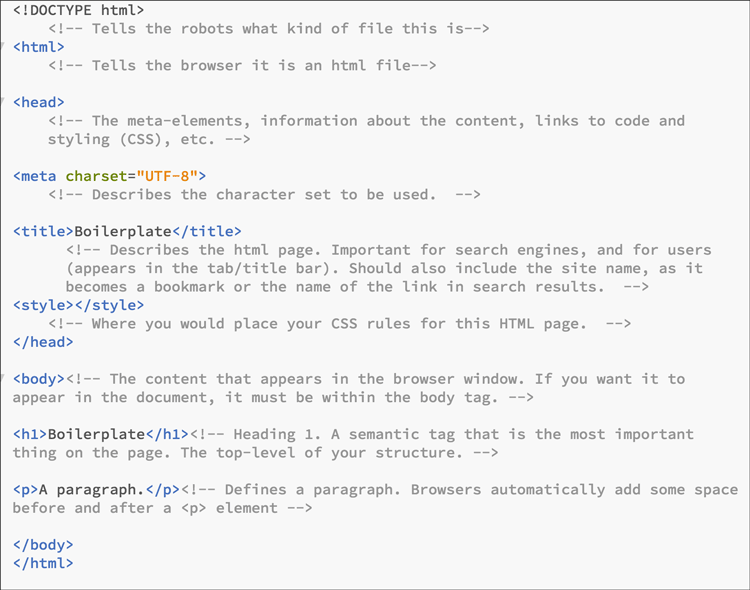
Here’s a screen shot of the boilerplate html page we downloaded for the first page lesson. The stuff in grey are comments, and they describe what all of these basic tags do.
Attributes
HTML tags can also have attributes, which convey extra information about the tag. They are written in the opening tag, and have name/value pairs, such as: name=”value”.
Images come with a “source” attribute, which tells the browser where to find the image asset. It looks like this:
<img src="file.jpg">
Images also have height and width values included.
<img src="file.jpg" with="500" height="500">
Another important attribute for images is the “alt” attribute, which stands for alternate text. This is the text that would display if the image isn’t loading properly, or if your audience member is using a text reader to “hear” the content. (This helps with accessibility.)
<img src="file.jpg" with="500" height="500" alt"describing the image">
Links, the <a> tag, come with an “href” attribute that tells the browser where the destination of the link leads. For example, a link to the Western U homepage:
<a href="https://www.uwo.ca">The link to Western U </a>
Block vs Inline Elements
This is getting ahead a little, because this is an important concept to have before using CSS, but I’ve included it here. Essentially, think of block elements as structural, and inline elements as textual. You can nest block elements, and you can put an inline element in a block. You can’t put a block element within an inline element.
(Except for a link <a> which can go around anything.)
Block elements:
- fill as much width as their parent container will allow
- can have padding and margins
- in the static flow, will appear underneath the previous block element
- won’t use a vertical-align property.
Common block elements:<p>, <h1-6>, <div>, <ul>, <ol>, <li>, <header>, <nav>, <footer>
Inline elements:
- appear within a block element in the static flow
- ignores width and height properties
- ignores margins on the top and bottom
- acts like a block element if you float it (more on that later)
- can be vertically aligned.
Common inline elements:
<a>, <span>, <b>, <em>, <i>, and technically, <img>